Wood carving is an art form that has been practiced for centuries, passed down through generations. As with any craft, mastering the basics is crucial, and in wood carving, one of those basics is understanding how to properly hold and grip your tools. A correct grip not only ensures precision and detail in your work but also guarantees safety. In this comprehensive guide, we’ll delve deep into the techniques of holding your wood carving tools the right way
1. The Importance of Proper Grip
Safety First:
The primary reason for learning the correct grip is safety. Wood carving tools are sharp, and an improper hold can lead to accidents. A firm, controlled grip ensures that the tool does not slip, reducing the risk of injury.
Precision in Carving:
The way you hold your tool directly impacts the control you have over it. A proper grip ensures that you can make precise cuts, essential for detailed work.
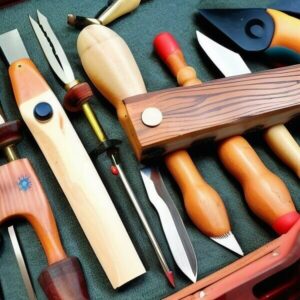
2. Holding Different Wood Carving Tools
Different tools require different grips. Let’s explore the most common ones:
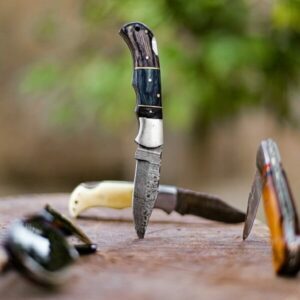
Knives:
The most basic tool in a carver’s arsenal, the knife is typically held like a pencil for detailed work. For more forceful cuts, a full-hand grip, similar to holding a hammer, is more appropriate.
Gouges:
These are held with a full-hand grip, with the bevel side facing the wood. The thumb should be on the tool’s shaft, providing control and direction.
Chisels:
Hold chisels with one hand on the handle and the other on the metal shaft. This dual grip provides maximum control, especially when using a mallet.
V-tools:
Similar to gouges, V-tools are held with a full-hand grip. The thumb’s positioning is crucial, guiding the tool as it moves.
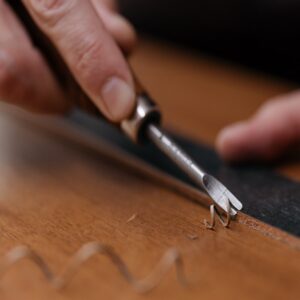
3. The Power Grip vs. The Pinch Grip
The Power Grip:
This grip involves wrapping your hand around the tool’s handle, using the strength of your entire hand and wrist. It’s ideal for rough cuts where more force is needed.
The Pinch Grip:
Used for detailed work, this grip involves holding the tool between the thumb and the first two fingers, similar to holding a pencil. It offers more control and precision.
4. Body Posture and Hand Position
Your grip isn’t the only thing that matters. Your body’s posture and the position of your hands relative to the wood play a significant role in effective carving.
Stabilize Your Work:
Ensure that the wood piece is firmly clamped or held. A moving workpiece can disrupt your grip and lead to mistakes or injuries.
Hand Position:
Always keep your non-dominant hand behind the tool. This hand can be used to stabilize the wood or guide the tool, but it should never be in the tool’s path.
5. Tips for Enhancing Grip and Control
Tool Maintenance:
A well-maintained tool is easier to grip. Ensure that the handles are smooth, without any splinters. Regularly oiling the handles can also improve grip.
Wearing Gloves:
Carving gloves can enhance grip, especially if your hands are sweaty. They also offer an added layer of protection.
Practice:
Like all skills, practice makes perfect. Regularly practicing your grip will make it second nature.
6. Common Mistakes to Avoid
Over Gripping:
Holding your tool too tightly can cause hand fatigue and reduce precision. Your grip should be firm but relaxed.
Using the Wrong Grip:
Always ensure you’re using the appropriate grip for the tool and the type of cut you’re making.
Conclusion
Mastering the art of wood carving starts with understanding the basics, and holding your tools correctly is fundamental. A proper grip ensures safety, control, and precision, allowing you to bring your artistic visions to life. Whether you’re a beginner or a seasoned carver, regularly revisiting and practicing these grip techniques will undoubtedly enhance your carving skills. Happy carving!
Certainly! Here are some common questions and answers related to the topic of holding and gripping wood carving tools:
Frequently Asked Questions (FAQs)
Q1: Why is the proper grip so important in wood carving?
A: A proper grip ensures safety, precision, and control. An incorrect grip can lead to accidents, imprecise cuts, and even strain injuries over time.
Q2: Can I use the same grip for all wood carving tools?
A: No, different tools require different grips. For instance, knives can be held like a pencil for detailed work, while gouges require a full-hand grip.
Q3: My hand gets fatigued quickly. What can I do?
A: Over-gripping or holding the tool too tightly can cause hand fatigue. Ensure your grip is firm but relaxed. Taking regular breaks and doing hand exercises can also help.
Q4: Are carving gloves necessary?
A: While not mandatory, carving gloves can enhance grip and provide an added layer of protection against cuts. They are especially recommended for beginners.
Q5: How often should I practice my grip?
A: As with all skills, the more you practice, the better you become. Regularly practicing, especially when starting, will help make the correct grip second nature.
Q6: I’m left-handed. Does the grip technique change for me?
A: The fundamental principles remain the same, but you’ll reverse the hand positions. For instance, if a right-handed person holds a chisel with their right hand on the handle, you’ll hold it with your left.
Q7: How do I know if I’m using the wrong grip?
A: Signs of an incorrect grip include lack of control, imprecise cuts, hand fatigue, or discomfort. If you’re unsure, consider consulting with an experienced carver or watching instructional videos.
Q8: Can the type of wood affect how I grip my tools?
A: Yes, harder woods might require a firmer grip and more force, while softer woods might need a gentler touch. Always adjust your grip based on the wood you’re working with.